Zeven Development
Hydroponics Growbed Sensors/Display Module (Using New IO Adder!)
Build a sensor monitoring systems for your Hydroponics Growbed
This monitoring system has been designed for use in the aeroponics method of hydroponics, where the crops roots are submerged all the time in an oxygen rich water reservoir.
- Monitor growbed water temperature.
- Monitor growbed nutrient level using a TDS (Total Dissolved Solids Sensor).
- Monitor growbed water levels using an optical level sensor.
- Display growbed data on a 1.3" OLED display for real time feedback.
- Sensors can monitor two different growbeds at the same time.
Hydroponics Growbed Module

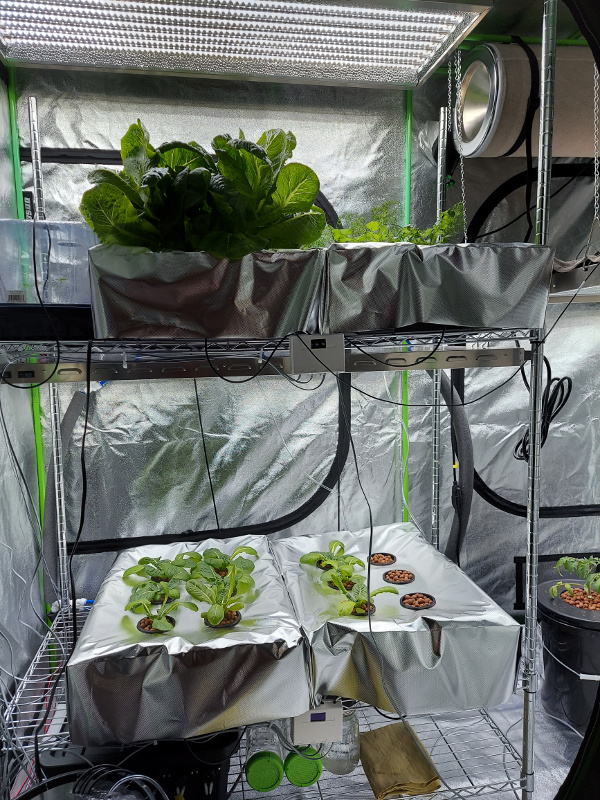
Four Growbeds with two Growbed Modules daisy chained together for an upper and lower status display.
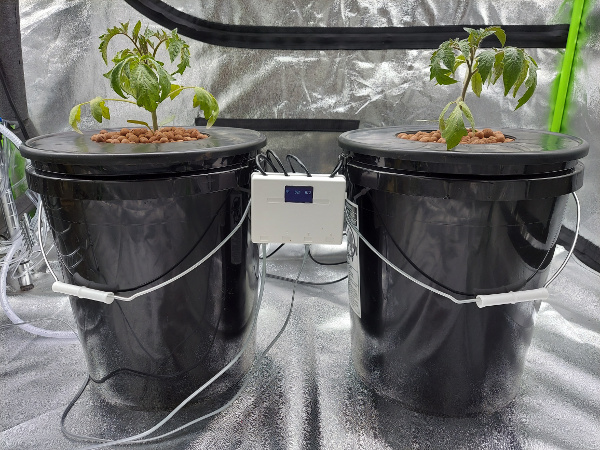
Finally a third daisy chained Growbed Module on a Deep Water Culture Bucket system.
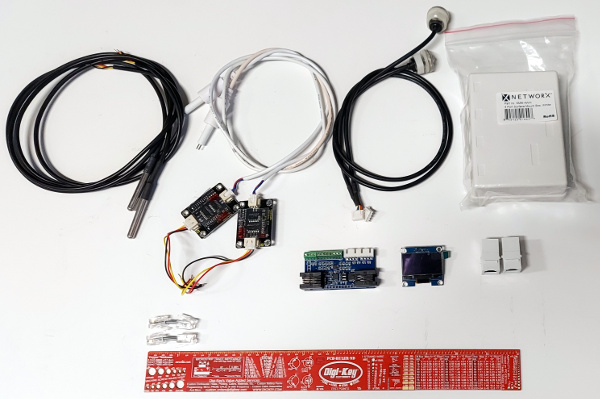
Parts Needed
| Qty | Part | Description | Cost |
|---|---|---|---|
| 1 |  |
IO Adder. | $45.00 |
| 1 |  |
4 Port Surface Mount Box White. | $2.10 |
| 3 |  |
Keystone Jack Crossover White. | $2.10 |
| 1 |  |
1.3" I2C 128x64 SSD1306 OLED LCD Display White. | $8.65 |
| 2 |  |
KEYESTUDIO Water Quality TDS Meter Total Dissolved Solids Sensor. | $7.99 |
| 2 |  |
Optical Infrared Liquid Water Level Control Switch. | $3.23 |
| 2 |  |
1M Waterproof DS18B20 Digital Temperature Sensor. | $1.99 |
Wiring Diagram
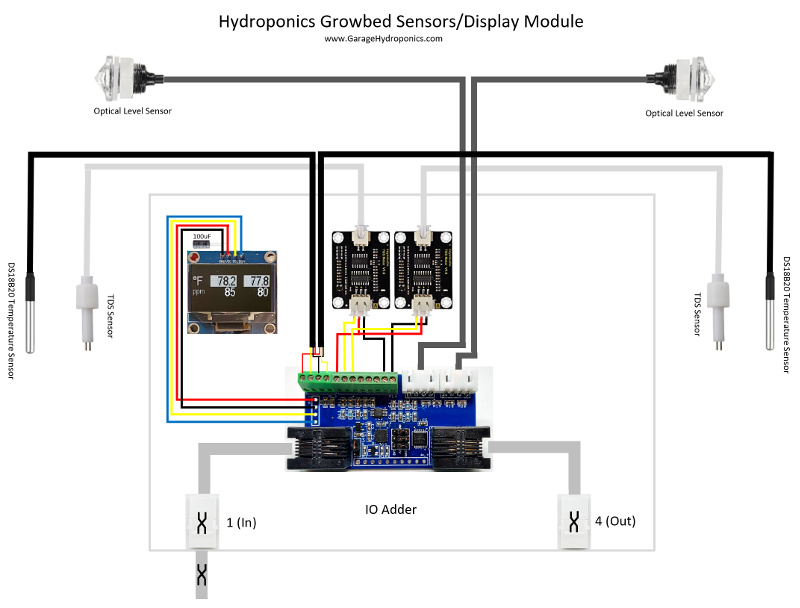
Note: Where you see the 'X' in the phone cable indicates a reverse wiring. Two reverse wires is the same as a straight through wire.
OLED Display

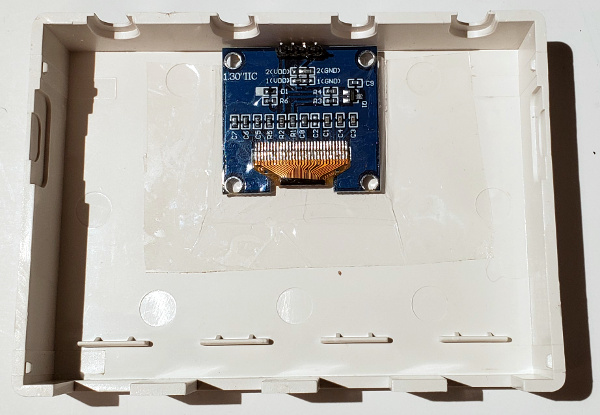
Using an exacto knife carefully cut out the OLED screen window in the front of the enclosure.

Position the OLED display on the underside of the enclosure cover and make sure only the screen is visible through the cut out windows. Then secure it use clear packing tape.
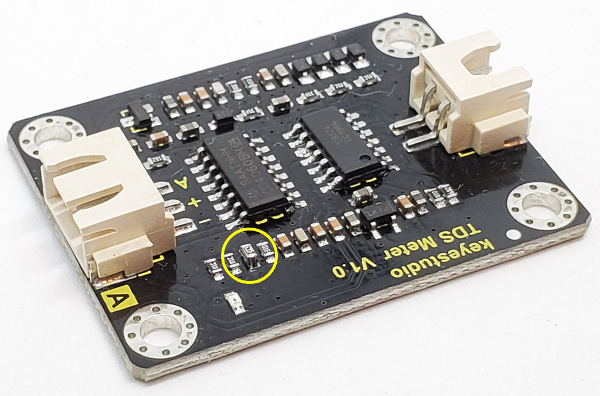
Modify the TDS sensor control board by adding an additional 0603 5.6K 1% resistor in parallel to effectively double the reported TDS maximum level to 2000 ppm. Just place it right on top of the existing 5.6k resistor and solder the sides together. By running the 5.6K in parallel you are effectively halving the resistance. 5.6K / 2 = 2.8K.
Lay the two TDS sensor control boards on the bottom of the enclosure. Attach thick single sided tape over the TDS circuit board to insulate it.
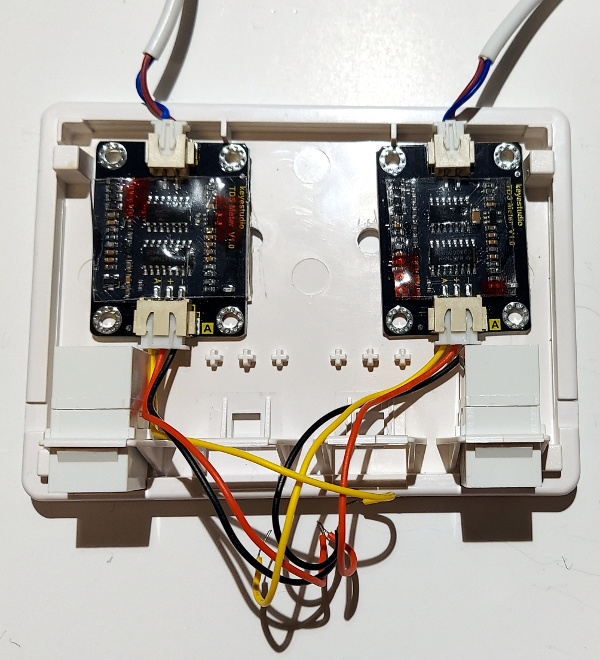
Wire up the IO Adder, and connect the RJ11 wire to both sides, laying it on top of the TDS control boards.
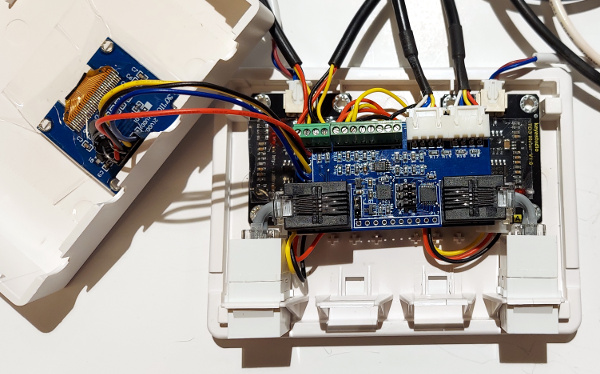
Finally close the enclosure carefully, making sure you don't pinch any cables.

To mount the Growbed Module to your shelf use zip tie adhesize-backed mounts.
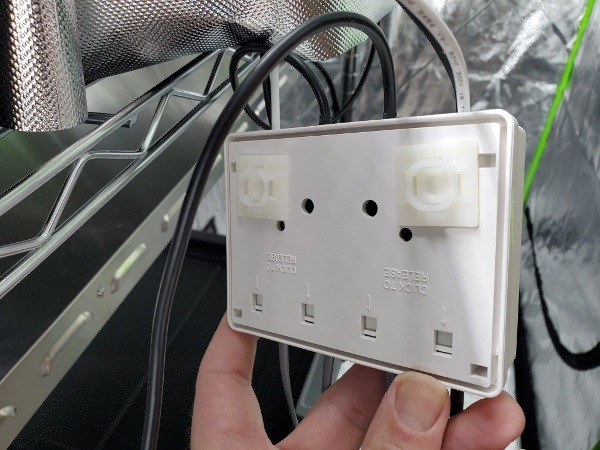
Now we are ready to install the sensors into the tote. Carefully cut a slot on the side nearest the module using an exacto knife and slide in the temperature and TDS sensor. The water level sensor will be installed in the center of the tote.
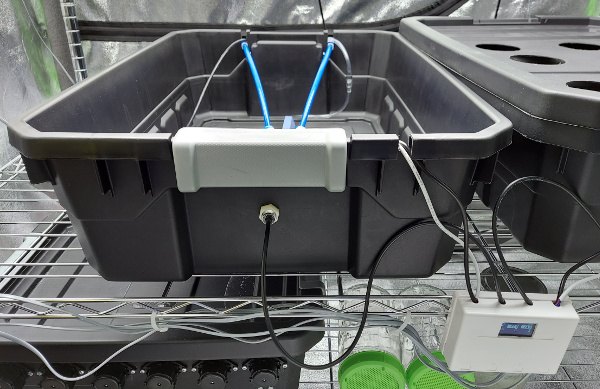
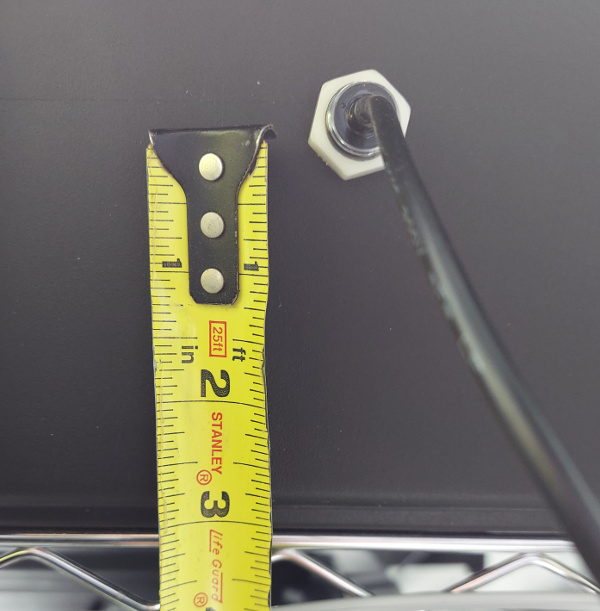
Measure 3" from the first bottom lip and drill a 9/16" hole. This will give us about 5 gallons of water when the optical water level sensor will trigger when it reaches the center of the prism. Open up the growbed module, disconnect the sensor from the optical connector and feed it through from the inside of the tote with the silicon washer being on the inside of the tote. On the outside feed the wire through the plastic nut and secure the sensor. Then connect the sensor back to the optical connector.
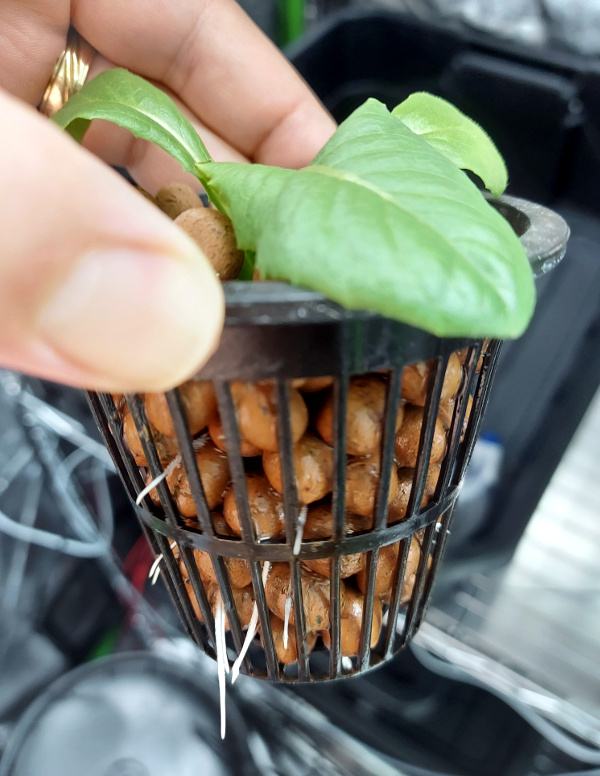
Make sure that the 3" net cups are not submerged in the water but just above or at the water line. With the air stone bubbling, the net cups should get wet. This way the base of the roots are wet but still exposed to the air.
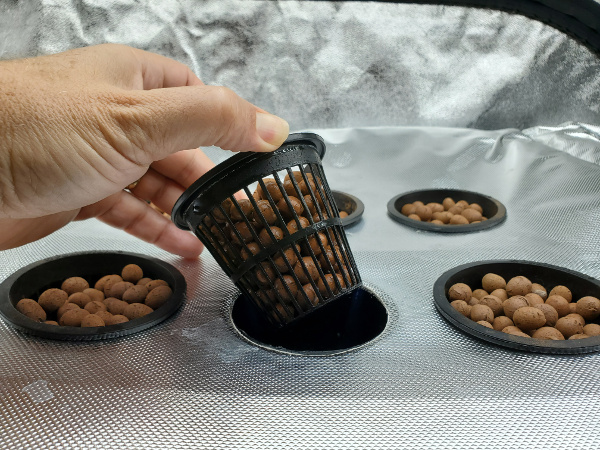
After you transplant from the germination bed you may need to manually water the seedlings until the root system explodes from the net cups.
For the Complete Garage Hydroponics Solution please see our other projects
Garage Hydroponics
Hydroponics Deep Water Culture Bucket System
Hydroponics Growbed Sensors/Display Module
Hydroponics Chiller
Hydroponics Water/Nutrient Control
Hydroponics Database Management
Hydroponics Germination Control
Hydroponics CO2 Monitoring
Hydroponics Light Monitoring
Hydroponics pH and DO Monitoring


